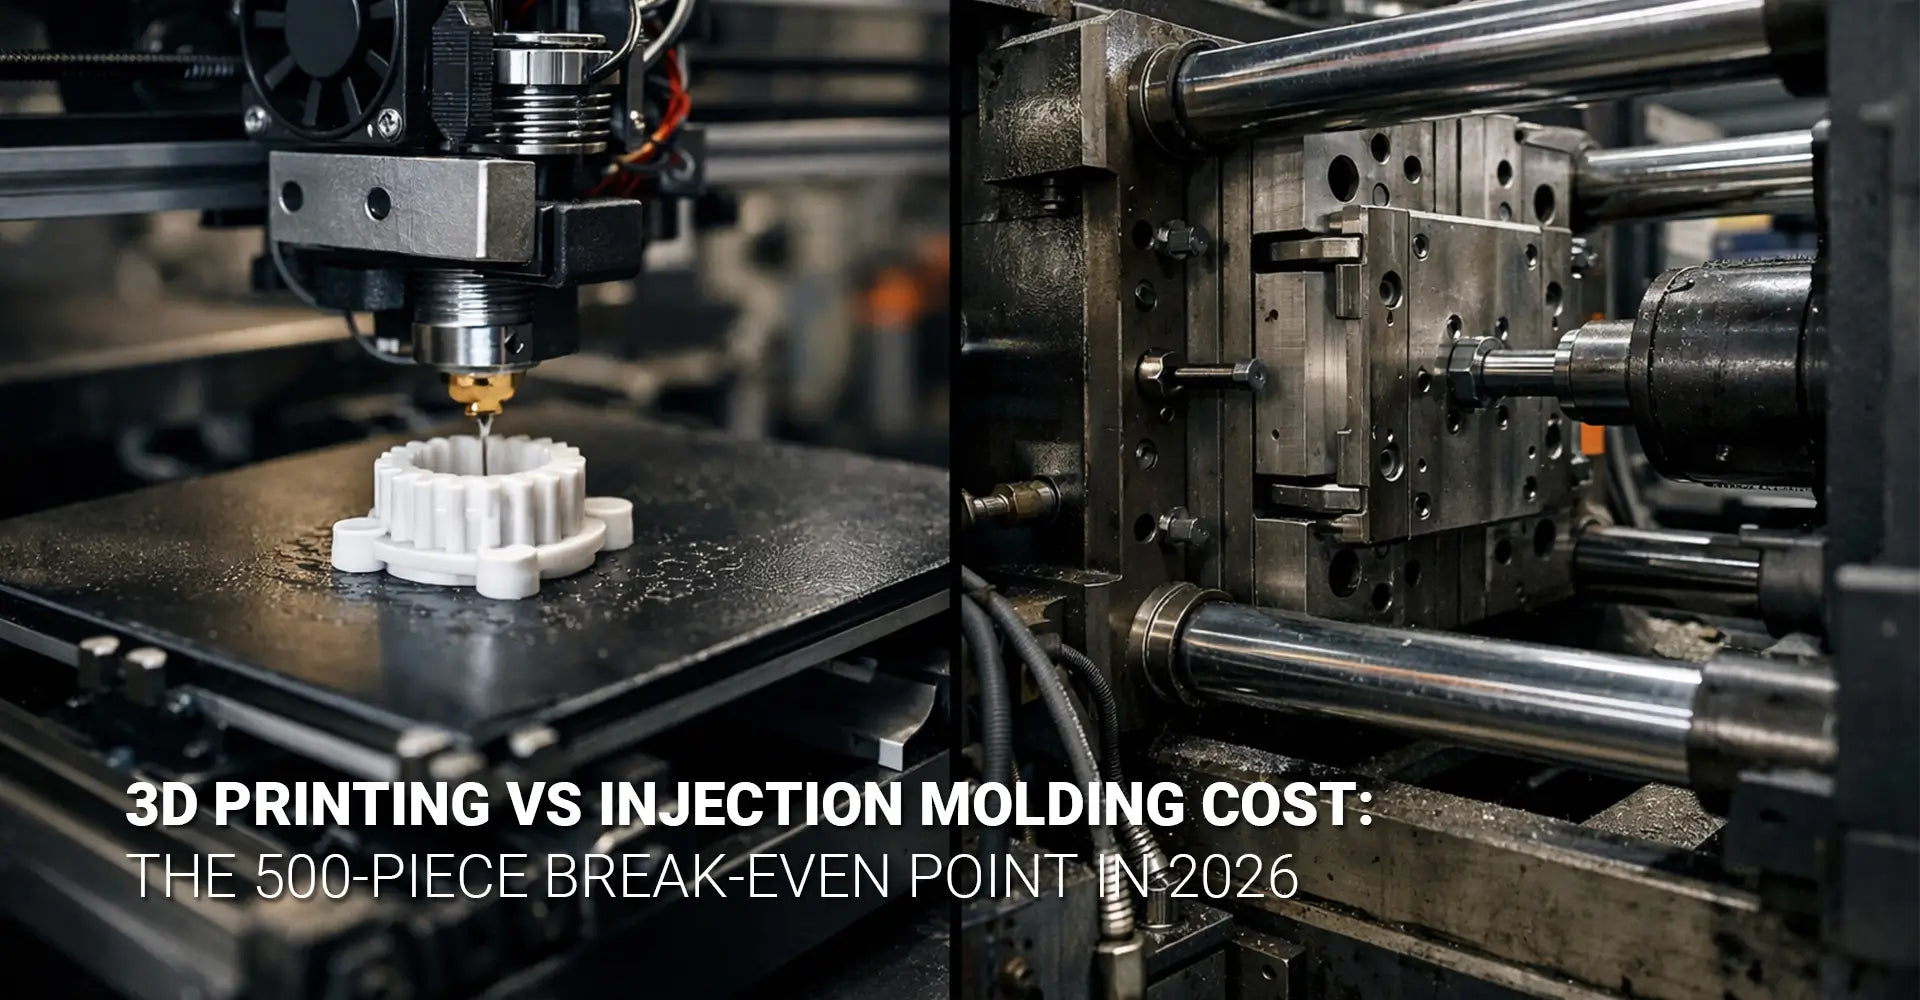
3D Printing vs Injection Molding Cost: Where's the Break-Even Point at 500 Parts?
3D Printing vs Injection Molding Cost: Where's the Break-Even Point at 500 Parts?

You need 500 plastic parts for your product launch in 2026. Should you invest thousands of dollars in an injection mold, or should you stick with 3D printing? This question keeps product managers and engineers up at night because getting it wrong means either wasting money on expensive tooling you'll never recoup or paying far too much per part when a mold would have paid for itself. The truth is that 500 units sits right in the gray zone where both methods can make financial sense—but only if you understand the specific factors that tip the scales one way or the other.
Key Takeaways: Quick Cost Comparison
| Production Volume | Best Choice | Why? | Typical Total Cost |
|---|---|---|---|
| Under 200 parts | 3D Printing | No tooling cost; design flexibility | $1,000 - $10,000 |
| 200-500 parts | Depends | Part size, complexity, and tooling cost determine winner | $3,000 - $25,000 |
| 500-1,000 parts | Quick Tooling | Lower mold cost bridges the gap | $5,000 - $30,000 |
| Above 1,000 parts | Injection Molding | Per-part cost drops dramatically | $8,000 - $50,000+ |
| Design still changing | 3D Printing | Mold changes cost thousands each time | Variable |
Understanding the 3D printing vs injection molding cost equation requires looking beyond simple price tags. Instead, you need to think about two fundamentally different cost structures: one method charges you per part with almost no upfront investment, while the other demands thousands upfront but rewards you with pennies-per-part pricing at scale. Moreover, the break-even point isn't a fixed number—it shifts based on your part's size, complexity, material requirements, and how certain you are about your volume projections. Let's break down exactly how these economics work so you can make the right choice for your specific project.
Table of Contents
- How Do 3D Printing and Injection Molding Costs Actually Compare?
- What Makes 500 Parts the Tricky Break-Even Zone?
- Can Quick Tooling Split the Difference Between Printing and Full Molding?
- How Should You Decide: A Simple Cost Playbook for 2026 Projects?
- FAQ: Common Questions About Cost and Volume
How Do 3D Printing and Injection Molding Costs Actually Compare?
The fundamental difference between these two manufacturing methods comes down to their cost structures. Consequently, understanding this distinction is the first step toward making a smart decision for your project.
Here's what you need to know about pricing in 2026:
3D printing operates on a pay-per-part model with virtually no upfront tooling investment. Each part you print costs roughly the same whether you're making your first piece or your five hundredth. On the other hand, injection molding flips this equation completely—you pay thousands of dollars upfront for a mold, but then each individual part becomes extremely cheap to produce.
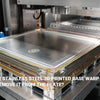
Let's look at typical numbers you'll encounter in 2026. For 3D printing plastics, you're generally paying between $5 and $50 per part, depending on size, material, and complexity. There's no tooling cost, so your total expense is simply the number of parts multiplied by the per-part price. Meanwhile, injection molding requires an initial investment. A basic aluminum mold typically costs $2,000 to $10,000, while a full production steel mold can run anywhere from $10,000 to over $100,000. However, once that mold exists, each part might only cost $0.50 to $5.00 to produce.
To make this concrete, imagine you need 100 small plastic brackets for an electronics manufacturing project. If you 3D print them at $15 each, your total cost is $1,500 with zero upfront investment. Alternatively, if you pay $5,000 for an aluminum injection mold and each molded part costs $2, your total investment becomes $5,200 for those same 100 brackets. At this volume, 3D printing clearly wins. But what happens when you need 500 brackets? The 3D printing cost climbs to $7,500, while the injection molding total only reaches $6,000 ($5,000 mold + 500 × $2). Suddenly, molding becomes cheaper—and the gap only widens as volume increases.
The reason for this dramatic shift lies in how costs scale. With 3D printing, every additional part adds the same incremental cost. With injection molding, the mold cost gets divided across more and more parts, so the effective cost per piece keeps dropping. At 1,000 parts, your injection molded brackets cost just $7,000 total ($7 per part), compared to $15,000 for 3D printing. This is why the 3D printing cost vs injection molding debate always comes back to volume—the more parts you need, the more attractive molding becomes.
What Makes 500 Parts the Tricky Break-Even Zone?
When manufacturers talk about the injection molding breakeven volume, they're usually pointing somewhere between 200 and 1,000 units. However, 500 parts represents a particularly interesting inflection point because it's exactly where many small-to-medium production runs land—and it's precisely where the "right answer" becomes highly dependent on your specific circumstances.
Several critical variables determine whether 3D printing or injection molding wins at this volume:
Part size plays a massive role in the equation. Smaller parts require less material and shorter print times, which keeps 3D printing costs manageable even at higher volumes. Additionally, smaller parts typically need simpler, less expensive molds. Therefore, a tiny component might hit its break-even point at just 150-200 units, while a large housing might not cross over until 800-1,000 units.
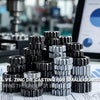
Complexity introduces another layer to the decision. A simple geometric shape with no undercuts, threads, or intricate details can use a straightforward two-cavity aluminum mold costing perhaps $3,000. In contrast, a complex part with internal features, multiple slides, or tight tolerances might demand a sophisticated mold costing $15,000 or more. This tooling cost difference dramatically shifts where the curves intersect. For instance, the simple part might make injection molding cheaper at just 200 units, while the complex part might not justify the mold investment until you reach 750 units.
Material selection further complicates the calculation. Standard materials like ABS or PLA work well in both processes at reasonable costs. However, if you need engineering-grade plastics like PEEK, Ultem, or carbon-fiber-filled nylon, both methods become more expensive—but not proportionally. Some high-performance materials significantly increase 3D printing costs per part, while others mainly impact injection molding through higher mold wear and material processing costs.
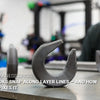
Tolerance and surface finish requirements also factor into the equation. If your automotive component demands tight dimensional tolerances or a Class A surface finish, you might need post-processing for 3D printed parts (adding cost) or a more expensive mold with polished cavities (increasing upfront investment). These requirements can shift the 3D printing vs molding for 500 parts calculation by thousands of dollars in either direction.
Let's walk through two real-world scenarios to illustrate how these variables interact. First, consider a simple snap-fit enclosure measuring 50mm × 30mm × 20mm. With basic geometry and standard ABS material, you could 3D print these for about $8 each or invest $4,000 in an aluminum mold and produce them for $1.50 each. At 500 units, 3D printing costs $4,000 while injection molding costs $4,750—still slightly more expensive, but close enough that lead time or design flexibility might tip your decision. Now imagine a complex gear assembly with internal channels and tight tolerances. 3D printing might cost $25 per part due to support material and post-processing, while a sophisticated mold could cost $12,000 with a per-part cost of $3. At 500 units, that's $12,500 total for 3D printing versus $13,500 for injection molding—again, very close, but the complex part pushes the break-even point higher.
Can Quick Tooling Split the Difference Between Printing and Full Molding?
Between the extremes of pure rapid prototyping with 3D printing and full production injection molding lies an increasingly popular middle ground: quick tooling, also known as rapid tooling. This approach offers a compelling solution for projects sitting right in that 500-part decision zone.
Quick tooling delivers several key advantages:
Instead of waiting 8-12 weeks for a hardened steel production mold, quick tooling typically takes just 2-4 weeks. Rather than investing $20,000-$100,000 in production-grade tooling, you'll spend $2,000-$15,000. And instead of being locked into a mold that can only be modified at great expense, quick tools often allow for minor adjustments before committing to final production tooling.
Quick tooling achieves these benefits by using aluminum instead of hardened steel for the mold base and by simplifying certain mold features. Aluminum machines faster and costs less than steel, though it also wears out sooner—typically good for 500 to 5,000 shots depending on the material and part geometry. For many projects, this limitation isn't a problem because quick tooling serves as a bridge technology, not an endpoint. Furthermore, quick tool molds often skip certain production features like lifters for complex undercuts or family molds with multiple cavities, keeping the tooling simpler and cheaper.
The quick tooling for injection molding approach shines brightest in a staged development strategy. Here's how smart manufacturers use it: Start with 10-50 prototype parts using 3D printing to validate your design, fit, and function. This phase might cost $500-$2,500 but gives you complete design freedom to iterate quickly. Once the design stabilizes, invest in quick tooling to produce your initial production run of 500-2,000 parts. This step costs $5,000-$15,000 total but proves your market demand and product viability at a reasonable per-part cost. Finally, if your product succeeds and you're confident about ongoing volume, invest in a full production steel mold for long-term manufacturing at the lowest possible per-part cost.
This staged approach dramatically reduces financial risk compared to jumping straight to production tooling. Consider a startup launching a new consumer product through crowdfunding. They 3D print 20 prototypes for $1,200 to shoot marketing photos and test functionality. The campaign succeeds, and they receive 800 pre-orders. Instead of gambling $25,000 on a production mold before seeing actual sales, they spend $8,000 on quick tooling ($5,000 for the mold + 800 × $3.75 per part). If the product takes off and they need another 10,000 units over the next year, they can then justify the production mold investment. If it doesn't, they've fulfilled their orders without overinvesting in infrastructure.
The rapid tooling vs 3D printing comparison becomes especially interesting when you factor in per-part quality and consistency. While modern 3D printing produces excellent parts, injection molded parts—even from quick tools—typically offer better surface finish, tighter tolerances, and more consistent mechanical properties. For customer-facing products or components with demanding performance requirements, this quality advantage might justify quick tooling even at lower volumes than pure economics would suggest.
How Should You Decide: A Simple Cost Playbook for 2026 Projects?
Making the right choice between 3D printing and injection molding for your 500-part project requires asking yourself four critical questions. By honestly answering these questions, you can avoid the most common and expensive mistakes manufacturers make.
Your decision framework should evaluate these key factors:
Volume certainty: How confident are you that you'll actually need 500 parts—or more? If you're launching a completely new product with unproven market demand, the risk of overinvesting in tooling is high. Conversely, if you're expanding a proven product line or fulfilling a confirmed purchase order, the volume certainty makes tooling investment much safer. Additionally, consider your growth trajectory. If 500 units represents your total lifetime need, the calculation is straightforward. But if 500 is just your initial order with strong potential for 5,000 more, the prototype to production cost crossover math changes completely.
Design stability: Is your design locked and final, or might you need changes? Every time you modify an injection mold, you're looking at hundreds to thousands of dollars in machining costs and several weeks of delay. Meanwhile, updating a 3D printed part simply means revising your CAD file and printing again. For products still in development or where customer feedback might drive changes, staying in 3D printing longer protects you from expensive mold rework. The small batch plastic production flexibility of additive manufacturing really shines during this phase.
Budget risk tolerance: Can your project absorb the tooling cost if volume projections fall short? This question gets to the heart of financial risk management. Spending $10,000 on a mold for a project that only produces 200 parts means you've paid an extra $50 per part compared to staying with 3D printing. For a well-funded company, this might be an acceptable learning cost. For a bootstrapped startup, it could be financially crippling. Honestly assess what happens to your project if the mold investment doesn't pay off.
Timeline requirements: Do you need parts next week or can you wait a month? 3D printing offers incredible speed for low volumes—you can often have parts in hand within days. Injection molding, even quick tooling, typically requires 2-6 weeks from order to first parts. If you're racing to meet a trade show deadline or responding to an urgent customer need, 3D printing's speed advantage might override cost considerations entirely.
Let's apply this framework to three different real-world scenarios to see how the additive manufacturing vs molding economics play out in practice:
Scenario 1 - Proven Product Variant: An established manufacturer wants to add a new size variant to their existing product line. They have five years of sales data showing consistent demand of 2,000+ units annually for similar variants. The design is finalized based on their proven platform. They have a healthy operating budget and a 6-week timeline before the next production run. Decision: Go directly to injection molding. The volume certainty and design stability strongly favor molding, and the budget can easily absorb the tooling investment that will pay back quickly.
Scenario 2 - Crowdfunding Launch: A startup creates an innovative consumer gadget and launches a crowdfunding campaign. They receive 650 pre-orders but have never sold this product before. The design has been prototyped but hasn't been tested by real customers yet. The startup's total runway is limited, and backers expect delivery in 8-10 weeks. Decision: Stick with 3D printing or consider quick tooling. The volume uncertainty and limited budget make full production molding too risky. 3D printing all 650 units keeps maximum flexibility, while quick tooling offers a middle path if unit costs become prohibitive.
Scenario 3 - Pilot Program with Growth Potential: A medical device company launches a limited-market pilot for a new accessory component. Initial orders total 500 units across three hospital systems, with strong indication that successful pilots will lead to 10,000+ unit orders over the following year. The design is validated through extensive testing. The company is well-funded but cautious about market acceptance. They have a 4-week delivery target. Decision: Use quick tooling. This bridges the gap perfectly—low enough investment to be acceptable for the pilot, but good enough unit economics and quality for customer-facing parts, with the ability to move to production tooling if pilots succeed.
To model your specific situation, use this simple calculation framework:
3D Printing Total Cost = Number of Parts × Per-Part Cost
Injection Molding Total Cost = Tooling Cost + (Number of Parts × Per-Part Cost)
Then calculate the break-even volume: Break-Even Volume = Tooling Cost ÷ (3D Print Per-Part Cost - Injection Mold Per-Part Cost)
Finally, and most importantly, model the "what if it fails" scenario: Cost if Volume Falls Short = Actual Units × 3D Print Cost vs. Tooling Cost + (Actual Units × Mold Cost)
This last calculation reveals your true financial risk and often proves that understanding the low-volume injection molding cost dynamics is less important than managing downside risk appropriately.
FAQ: Common Questions About Cost and Volume
At what quantity does injection molding usually become cheaper than 3D printing?
Most recent analyses put the break-even somewhere between roughly 100 and 500 units, depending on part size, complexity, and mold cost. Smaller, simpler parts often cross over at 150-250 units, while larger or more complex parts might not become cheaper until 600-800 units. The key is getting actual quotes for your specific part rather than relying on general rules of thumb.
Is 500 parts in 2026 better done with 3D printing or injection molding?
It's right in the gray zone, which is why this question doesn't have a universal answer. For small, simple parts with modest tooling costs (under $5,000), molding can already be cheaper by 500 pieces. However, for complex or larger parts with expensive tooling ($10,000+), 3D printing may still have the lower total cost at this volume. Run the numbers for your specific case, and don't forget to factor in risk and design flexibility beyond pure cost.
What is "quick tooling" and when should I consider it?
Quick tooling uses simplified or aluminum molds to cut tooling cost and lead time, supporting runs in the hundreds to low thousands. You should consider it when you've outgrown pure 3D printing economics (typically above 300-500 parts), but you're not yet ready to commit to a full production mold—either because you lack volume certainty or because your design might still need refinement. It's the smart middle path that reduces both cost and risk.
How do design changes affect the cost choice?
Changing a 3D-printed design is cheap and fast—often just updating a digital file and printing again. Meanwhile, modifying an injection mold can cost $500-$5,000 and take 1-3 weeks depending on the change complexity. Therefore, if your design is still evolving based on user testing, regulatory feedback, or performance optimization, staying in 3D printing or quick tooling longer significantly reduces your risk and maintains flexibility.
What's the main financial risk of "opening a mold before volume"?
You lock thousands to tens of thousands of dollars into tooling that you might never amortize across enough parts. If your product stalls at a few hundred units instead of the projected thousands, your effective cost per part can be far worse than if you had stayed with 3D printing. For example, a $10,000 mold meant to spread across 5,000 units ($2 per part) becomes a $10,000 cost spread across just 300 units ($33.33 per part)—likely far more expensive than 3D printing those 300 parts would have been. This is why volume certainty matters more than almost any other factor in the decision.
Conclusion
The 3D printing vs injection molding cost question at 500 parts doesn't have a one-size-fits-all answer, and that's actually good news—it means you have options that can be tailored to your specific situation. The break-even point between these two manufacturing methods depends heavily on your part's size and complexity, the resulting tooling cost, your volume certainty, and how locked your design really is.
For most projects in this volume range, the smart money is on one of three strategies: stick with 3D printing if your design is still evolving or if you're uncertain about volume; invest in quick tooling if you have moderate confidence and want to bridge toward production; or commit to full injection molding only if you have proven demand and are confident about scaling beyond 1,000 units.
The biggest mistake manufacturers make isn't choosing the wrong process—it's failing to honestly assess their volume certainty and design maturity before making the investment. By modeling both scenarios with your specific numbers and factoring in the very real risk that your project might not scale as projected, you can make a decision that protects your budget while keeping your options open for future growth.
Related Resources
[3D printing vs injection molding cost][^1]
[low-volume injection molding cost][^2]
[quick tooling for injection molding][^3]
[small batch plastic production][^4]
----------
[^1]: A update on the economic crossover between additive and subtractive methods. It includes a calculator for "total cost of ownership" taking into account material waste and labor.
[^2]: A comprehensive cost-analysis guide that compares 3D-printed molds, aluminum tooling, and steel molds. It provides a detailed "Cost per Part" table for volumes ranging from 10 to 100,000 units.
[^3]: This guide for procurement officers explains "Rapid Tooling" mechanics, including the use of aluminum alloys and simplified mold designs to compress lead times to under 15 days.
[^4]: A technical deep-dive into low-volume methods, comparing resin casting, SLS printing, and CNC machining for professional-grade plastic enclosures.

