Custom Threaded Parts Manufacturing: Are You Paying More Than You Should for the Wrong Thread?
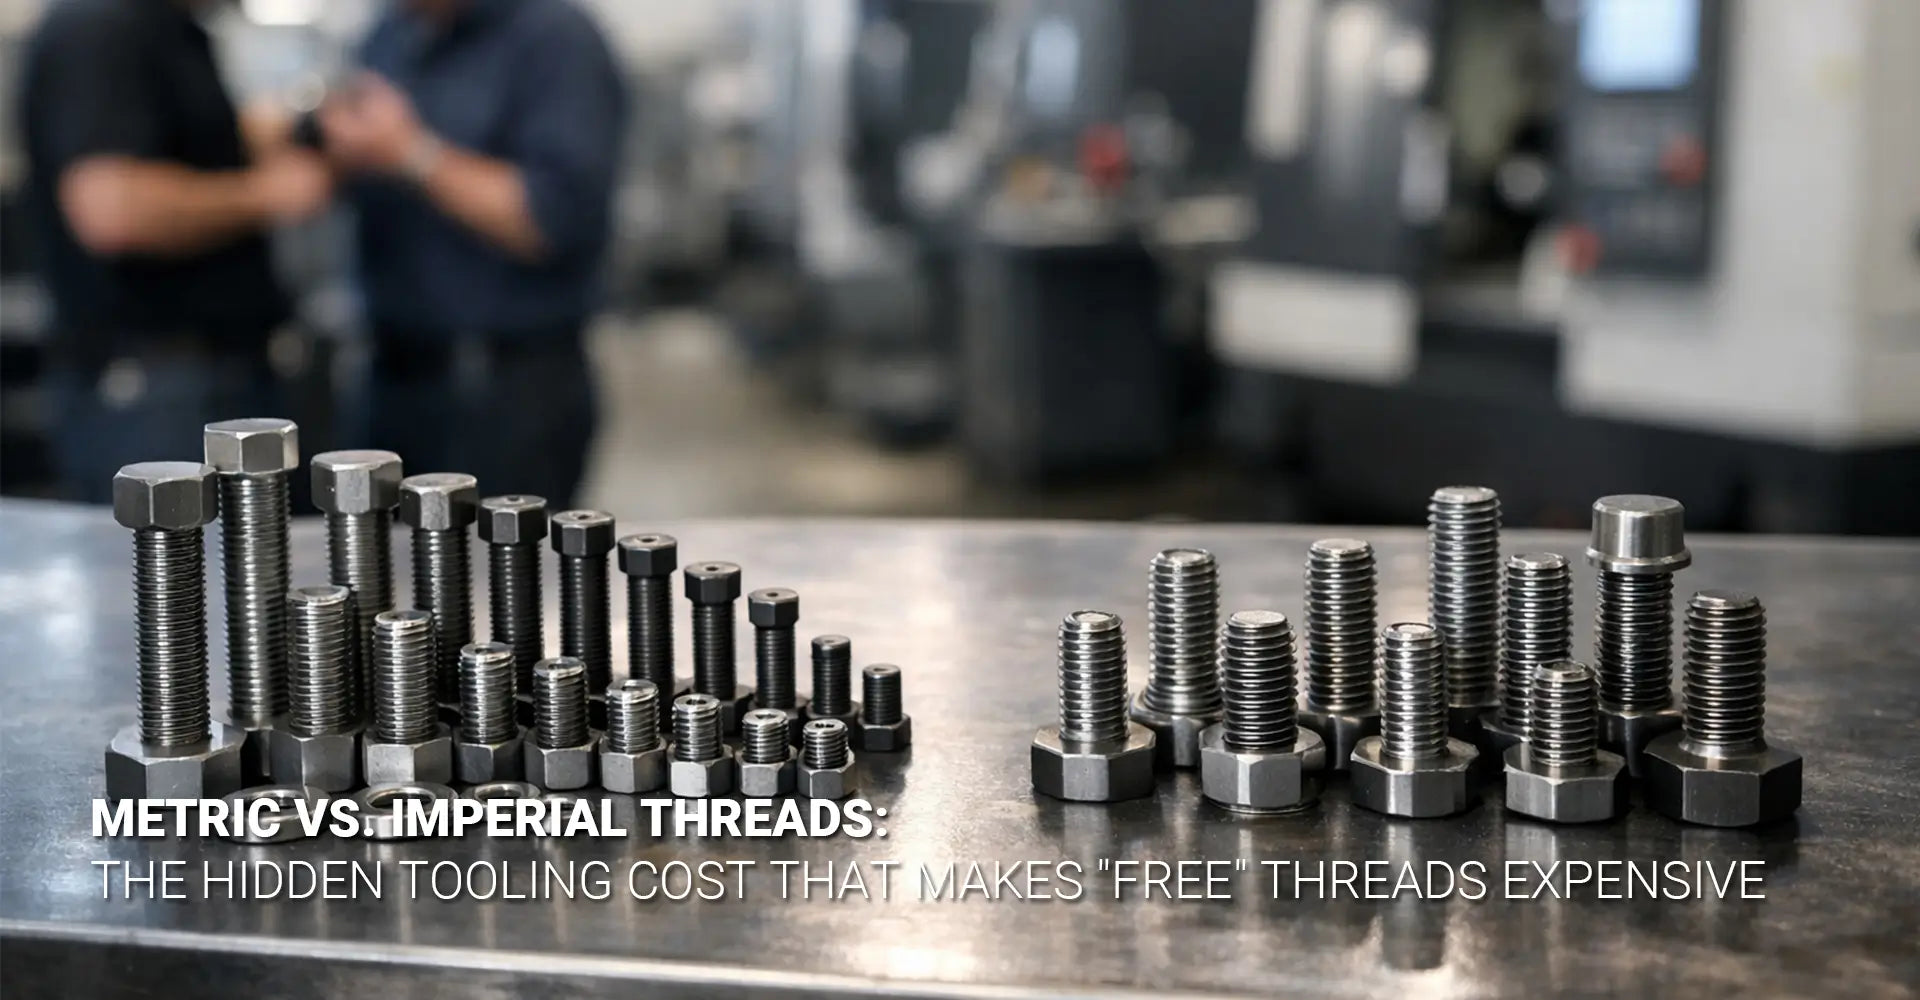
Custom Threaded Parts Manufacturing: Are You Paying More Than You Should for the Wrong Thread?

You need a batch of threaded parts. You pick a thread spec, send the drawing, and wait. Then the quote comes back — two weeks lead time and a price that doesn't add up. Sound familiar? Most of the time, the thread spec itself is the problem. Choosing the wrong thread — even by a fraction of a millimeter in pitch — can double your cost and add weeks to your delivery. This guide shows you exactly how to avoid that.
The fast answer: Standard threads use in-stock taps that cost $30–$50 and ship same day. Non-standard threads need special tooling that costs $200–$400 and takes 7–14 days to arrive. For small batches, that single decision can add $2–$8 per part in cost — and two weeks to your timeline. Always design around what your shop already stocks.
Quick-Reference: Standard vs. Custom Thread at a Glance
| Factor | Standard Thread | Custom/Special Thread |
|---|---|---|
| Tap Cost | $30–$50 (in stock) | $200–$400 (special order) |
| Lead Time | Same day – 2 days | 7–14 days |
| Per-Part Premium (50 pcs) | Baseline | +$2–$8 per part |
| Per-Part Premium (500 pcs) | Baseline | +$0.40–$0.80 per part |
| Thread Milling Flexibility | High — stocked cutters | Low — special cutters |
| Thread Rolling Availability | Yes — standard dies stocked | No — custom dies needed |
| Risk of Delay | Low | High |
So what makes a thread "standard" versus "special"? And why does that distinction hit your budget so hard? Let's walk through every layer — from tooling reality to batch math — so you can make smarter decisions on your next CNC machining order.
Table of Contents
- The Two-Week Surprise — Why Your "Simple" Thread Is Adding Lead Time
- The Tooling Trap — What Really Drives Up Your Custom Threaded Parts Cost
- What Does Every Shop Already Stock — The Standard Thread Inventory
- Standard Thread vs. Special Thread — What Is the Real Cost Difference
- The Small-Batch Math — When Does Custom Thread Manufacturing Actually Make Sense
- Beyond Pitch — What Other Factors Drive Up Threading Cost
- Your 60-Second Thread Selection Tool — How to Pick the Right Thread Fast
- FAQ — Questions to Ask Your Custom Threaded Parts Supplier
The Two-Week Surprise — Why Your "Simple" Thread Is Adding Lead Time?
Most buyers assume threads are threads. You pick a size, the shop cuts it, done. But lead time surprises happen almost every week in machine shops — and threading is one of the top causes. The moment your spec steps outside the "standard" list, your machinist has to stop and order tooling. That wait becomes your wait.
Key fact: Standard taps are shelf items at every industrial supplier. Special taps — non-standard pitch, unusual diameter, or tight tolerance — typically require 7–14 business days to source. For a 50-part batch, that tooling wait becomes your entire lead time.
What counts as a non-standard thread?
- Any pitch not listed in the standard metric or unified coarse/fine tables
- Fine-pitch metric threads where coarse is standard (e.g., M8×0.75 instead of M8×1.25)
- Any non-standard diameter (e.g., M7, M9, or M11 — these are not commonly stocked)
- Specialty thread forms (ACME, trapezoidal, buttress) for general-use applications
Here's what actually happens behind the scenes. Your machinist checks the tool rack. If the tap isn't there, they check local suppliers. If it's a standard M6×1.0 or 1/4-20? They drive over and pick it up the same afternoon. If it's an M6×0.75 or some other non-standard thread tooling spec? They place a special order, and you wait. That 7–14 day window isn't the shop being slow — it's the supply chain doing exactly what it was designed to do for rare items. The fix is simple: don't spec rare items unless you genuinely need them.
The Tooling Trap — What Really Drives Up Your Custom Threaded Parts Cost?
Tooling cost is invisible on your drawing. It doesn't show up in your bill of materials. But it shows up in your quote — and it shows up hard. Understanding how each threading method uses tooling helps you design parts that cost less without sacrificing function. This is where custom threaded parts manufacturing decisions really get made.
Bottom line: The threading method your shop uses depends on your thread spec. Standard threads unlock the fastest, cheapest methods. Non-standard threads force slower, more expensive approaches — or special tooling purchases passed on to you.
Four threading methods and their tooling reality:
| Method | Speed | Tooling Cost | Works for Non-Standard? |
|---|---|---|---|
| Single-point threading | Slow (1–2 min/part) | Low (one insert) | Yes |
| Tapping | Fast (2–5 sec/hole) | Low if standard ($40) | Expensive if special ($250+) |
| Thread milling | Medium (10–15 sec/hole) | Medium — needs stocked cutter | Limited |
| Thread rolling | Fastest | High ($200–$600/die set) | No — standards only |
Single-Point Threading uses a lathe and a single insert to trace the thread form. It works on almost any thread — standard or not. But it takes 1–2 minutes per part. For 50 parts, that's 1–2 hours of machine time just for threading. It's the fallback when nothing else works.
Tapping is what most shops prefer. It's fast — 2–5 seconds per hole. A standard tap costs $30–$50 and is sitting on the shelf. The thread milling cost comparison becomes relevant when you need flexibility: a thread mill can cut multiple sizes with one cutter, but it's slower than a tap and still needs to be stocked for your specific pitch range.
Thread Rolling is the fastest method for high-volume work. However, rolling dies are pitch-and-diameter specific. They cost $200–$600 per set. And they only work on standard thread forms. If you spec a non-standard thread, rolling is off the table entirely — and so is its speed advantage.
The practical takeaway: standard threads give you access to all four methods. Non-standard threads leave you with single-point threading or expensive special taps. That's why the thread spec on your drawing has such an outsized impact on cost and cycle time.
What Does Every Shop Already Stock — The Standard Thread Inventory?
Want to know what thread to use? Ask your machinist what's on the rack. Good shops maintain a predictable inventory of taps, dies, and thread mills for the most-used sizes. Designing to that inventory is the single fastest way to reduce lead time and cost. This is what experienced engineers call "designing for the tool rack" — and it's the foundation of smart thread tool inventory management.
Design rule: If your thread size appears in the lists below, you're safe. If it doesn't, ask before you finalize the drawing.
Metric Thread Standards (Coarse Pitch — most commonly stocked):
| Diameter | Standard Pitch | Also Common |
|---|---|---|
| M3 | 0.5 | — |
| M4 | 0.7 | — |
| M5 | 0.8 | — |
| M6 | 1.0 | — |
| M8 | 1.25 | 1.0 (fine) |
| M10 | 1.5 | 1.25 (fine) |
| M12 | 1.75 | 1.25 (fine) |
| M16 | 2.0 | 1.5 (fine) |
| M20 | 2.5 | 1.5 (fine) |
Imperial/Unified Thread Standards (most commonly stocked):
- Machine screws: #4-40, #6-32, #8-32, #10-24, #10-32
- Fractional: 1/4-20, 5/16-18, 3/8-16, 7/16-14, 1/2-13, 9/16-12, 5/8-11, 3/4-10
- Pipe: NPT 1/8, 1/4, 3/8, 1/2, 3/4, 1
9.3 [Sub-heading 3 Featured Image]

Why are these specific sizes everywhere? Because fastener manufacturers, hardware distributors, and industrial suppliers built their entire inventory around them decades ago. An M6×1.0 bolt is available in every hardware store on earth. That means the tap to cut its mating thread is also on every shop's shelf. The network effect is self-reinforcing: common threads are common because they're common.
The important point for metric vs. imperial thread selection is this: the "better" system is whichever one your shop, your customer, and your supply chain are already using. North American shops often lean imperial for general fasteners and metric for precision work. European and Asian shops are almost entirely metric. Know your context — and pick from the list that your machinist actually stocks. That conversation takes 60 seconds and can save you two weeks.
Standard Thread vs. Special Thread — What Is the Real Cost Difference?
Numbers make the decision easy. Let's put exact figures on the standard thread vs special thread comparison so there's no guessing. These are realistic figures from typical job shop pricing — not theoretical estimates.
For a batch of 50 parts:
- Standard M6×1.0: ~$40 tap (in stock) + ~$5 setup = ~$45 total tooling cost
- Special M6×0.75: ~$250 tap (7–14 day wait) + ~$5 setup = ~$255 total tooling cost
- That's a $210 difference — and two weeks of extra lead time — for the same functional result.
Cost breakdown by batch size:
| Batch Size | Standard Thread (Tooling Spread Per Part) | Custom Thread (Tooling Spread Per Part) | Premium |
|---|---|---|---|
| 10 parts | $4.50/part | $25.50/part | +$21/part |
| 50 parts | $0.90/part | $5.10/part | +$4.20/part |
| 100 parts | $0.45/part | $2.55/part | +$2.10/part |
| 500 parts | $0.09/part | $0.51/part | +$0.42/part |
| 1,000 parts | $0.045/part | $0.255/part | +$0.21/part |
The numbers above only cover tooling. Reducing threading cost also means accounting for cycle time. Standard threads allow tapping — the fastest method. Special threads often force single-point threading — the slowest method. At 1–2 minutes per part vs. 5–10 seconds for tapping, a 100-part batch can add 90–180 minutes of spindle time.
At a typical shop rate of $80–$150/hour, that's an extra $120–$450 in machining time alone — on top of the tooling premium. Combined, the true cost gap between a standard and non-standard thread on a 100-part batch can easily reach $300–$600 total. For CNC turning parts with multiple threaded features, multiply that across every hole.
That's the real cost of a "free" design choice.
The Small-Batch Math — When Does Custom Thread Manufacturing Actually Make Sense?
Non-standard threads aren't always wrong. Sometimes a specific pitch, form, or fit is genuinely required — for sealing, for load capacity, or for compatibility with existing hardware. The question is: at what volume does the tooling investment start making sense? This is the core math behind any custom fastener manufacturing decision.
Simple rule:
- Under 100 parts → Avoid custom tooling. The per-part premium is too high.
- 100–500 parts → Run the amortization math before committing.
- 500+ parts → Custom tooling starts to pay off if the thread is truly required.
Under 100 Parts — Avoid Custom Tooling
At low volumes, tooling cost dominates. A $250 special tap spread over 50 parts adds $5 per part before a single chip is cut. If redesigning to a standard thread is possible — even with minor assembly changes — that redesign pays for itself immediately. For industrial machinery components with small production runs, this tradeoff is especially critical.
100–500 Parts — Evaluate Amortization vs. Redesign
At this range, the math gets closer. A $300 tooling investment over 300 parts is $1 per part. If the part sells for $15–$50 each, that's a manageable premium — but only if you're sure repeat orders will come. If this is a one-time run, redesign is still the smarter path.
500+ Parts — Custom Tooling Begins to Pay Off
Above 500 parts, the per-part tooling premium drops below $0.50. Combined with the possibility of using faster threading methods at volume, the math can favor a non-standard thread — if and only if the thread spec delivers a functional benefit worth keeping.
The real question isn't "can we afford the special tap?" — it's "does this thread do something a standard thread can't?" In most cases, the honest answer is no. Sealing? An O-ring groove does it better. Extra holding strength? A larger standard diameter thread handles it. Fine pitch for adjustment? Many standard fine-pitch threads are available. The cases where a truly non-standard thread is irreplaceable are narrower than most designers assume.
Beyond Pitch — What Other Factors Drive Up Threading Cost?
Pitch gets most of the attention. But other thread specification choices can quietly inflate your cost just as much. Diameter, fit class, and thread form all affect thread cost optimization in ways that don't always show up until the quote comes back.
Three hidden cost drivers beyond pitch:
- Non-standard diameter — the most expensive choice you can make
- 3A/3B fit class — precision that adds inspection cost and reject rate
- Wrong system for your region — metric in an imperial shop, or vice versa
Metric vs. Imperial Thread Selection
This is often framed as a technical debate. In practice, it's a supply chain question. Metric taps are standard in most modern CNC milling shops. Imperial taps are standard in legacy North American toolrooms. Specifying imperial threads to a metric shop — or vice versa — doesn't make the thread impossible. But it may mean the shop needs to source additional tooling. Always ask.
2A vs. 3A Fit Class — Precision That Costs More Than You Expect
- 2A/2B (standard fit): Works for the vast majority of bolted joints. Inspection is simple. Reject rates are low.
- 3A/3B (precision fit): Required for aerospace, close-tolerance assemblies, and specific load-bearing applications. Adds inspection time and increases the reject rate on every batch.
Specifying 3A when 2A works is one of the most common — and most avoidable — cost adders in threaded part design.
Non-Standard Diameters — The Single Most Expensive Choice
M7, M9, M11 — these exist on paper. But almost no shop stocks taps for them. There is no supply chain ecosystem. Lead times stretch to 3–4 weeks, and tooling costs are high. If your design calls for a non-standard diameter, that is always the first thing to challenge in a design review.
For automotive parts and high-volume assemblies, these details compound quickly. A 3A fit on a non-standard diameter in the wrong thread system is a triple cost hit — each one individually avoidable, together potentially doubling your threading cost per part. Good design review catches these before the drawing is released. A quick call to your supplier catches them if review is skipped.
Your 60-Second Thread Selection Tool — How to Pick the Right Thread Fast?
You don't need a degree in thread standards to make a good call. You need three steps and 60 seconds. This is the practical thread cost optimization checklist that experienced engineers actually use — and it works every time.
The 60-second rule:
- Check the standard pitch chart
- Confirm with your machinist's tool inventory
- Design with the common thread — save money, save time
Step 1 — Check the Standard Pitch Chart
Look at the metric and imperial lists in Section 3 above. Does your required thread appear? If yes, you're done — use it. If no, move to Step 2 before changing your spec.
Step 2 — Confirm Against Your Machinist's Tool Inventory
Call or email your shop and ask: "What tap sizes do you keep in stock? We're finalizing thread specs and want to design around what you already have."
A good shop gives you a list in five minutes. A great shop adds: "We've got M6×1.0 and 1/4-20 both in stock — either would work for your load requirement."
Step 3 — Design Around the Common Thread
Once you know what's stocked, use it. Don't add fine-pitch "just to be safe." Don't use M7 because it's between M6 and M8. Pick the nearest standard size and confirm it meets your load and fit requirements. In 80% of cases, it does.
This process costs nothing. It takes less than a minute on your end and a five-minute conversation with your supplier. The payoff is real: no tooling delay, no cost premium, no two-week surprise. Engineers who do this consistently report that it's the single highest-value habit in threaded component design. The information asymmetry is enormous — your machinist knows exactly what's on the rack. You just need to ask.
FAQ — Questions to Ask Your Custom Threaded Parts Supplier
Q1: The "don't wait two weeks for an obscure thread" advice — is that realistic?
Absolutely. Standard taps are shelf items at every industrial supplier — available same day or next day. Special thread tooling typically requires 7–14 days for delivery. For a small batch, that tooling wait becomes your entire lead time. Choosing a standard thread eliminates that delay entirely.
Q2: How do I know if my thread is standard or special?
Check the lists in Section 3 of this article. If your thread — by diameter and pitch — appears there, it's standard. If the pitch is non-standard for that diameter (e.g., M8×0.75 instead of M8×1.25), or the diameter is unusual (M7, M9), you're in special territory. When in doubt, ask your supplier before finalizing the drawing.
Q3: What's the actual cost gap for a 50-part batch?
- Standard M6×1.0: ~$40 tap (in stock), 30-second tapping cycle → total tooling ~$45
- Special M6×0.75: ~$250 special tap (7–14 day wait), same cycle → total tooling ~$255
That's a $210 difference — and two weeks of lead time — for the same thread function.
Q4: What does "designing for the tool rack" mean?
It means selecting thread specs based on what your shop actually has in inventory, not just what looks correct on paper. A machinist with a full standard tap set can start your parts immediately. A machinist who needs to order a special tap will add lead time — and often passes the tooling cost to you.
Q5: Doesn't thread milling eliminate the tooling problem?
Partially. Thread milling is flexible — one cutter can handle a range of diameters. But stocked thread mills still cover standard pitch ranges. Non-standard pitches still require special cutters. And thread milling is slower than tapping (10–15 seconds per hole vs. 2–5 seconds). For 500 holes, thread milling makes sense. For 50 holes with a standard thread, tapping is faster and cheaper.
Q6: I need a specific thread to mate with an existing part. What do I do?
If the mating part is fixed, you have no choice — order the special tap and accept the lead time and cost. But before you do, ask:
- Can the mating part be updated to a standard thread? (Often yes in prototype or early-production designs)
- Can a thread insert (Helicoil or similar) bridge the gap — giving you a standard internal thread that accepts a standard fastener?
- Is the mating thread truly load-bearing, or just for retention? Many "critical" threads can be swapped to standards with no functional impact.
Q7: What is the single most expensive threading mistake?
Specifying a non-standard diameter with a standard pitch. For example, M10×1.0 (fine pitch) instead of M10×1.5 (standard coarse). The tap is special, the tooling cost is high, and the functional difference is negligible for most industrial applications. A close second: specifying 3A fit when 2A works — the tighter tolerance adds inspection cost and increases part rejection rates for no practical benefit.
Q8: How do I ask my supplier about thread options without sounding inexperienced?
Say this: "We're designing a small batch with threaded features. What thread sizes and pitches do you keep standard taps for? We'd prefer to design around what you already have to minimize lead time and tooling cost."
Any serious supplier will appreciate the question — and give you a useful answer.
Q9: Does the same logic apply to thread rolling vs. cutting?
Yes — and the stakes are even higher with rolling. Thread rolling dies are pitch-and-diameter specific, costing $200–$600 per set. The thread rolling vs cutting cost tradeoff only favors rolling at high volumes (typically 5,000+ parts) where the per-part cost drops dramatically. For low-volume work, tapping or thread milling with standard tools is almost always the better call.
Q10: What's the bottom line for my next threaded parts order?
Follow the 60-second rule:
- Check if your thread appears on the standard list above
- If yes — order with confidence. Cost and lead time will be minimal
- If no — call your machinist: "Do you stock tooling for this thread, or is it special?"
- If special — ask: "Can we switch to a standard thread without compromising function?"
In 80% of cases, the answer to step 4 is yes. That one conversation can save $200–$400 in tooling cost and 1–2 weeks in lead time.
Conclusion
Key Takeaways + Thread Cost Optimization Checklist
Threading is one of the most controllable cost variables in machined part design. The spec you put on your drawing directly determines which tools your machinist needs, how fast they can run your parts, and how long you wait for delivery. Here's the summary:
✅ Thread Cost Optimization Checklist:
- [ ] Thread diameter and pitch appear in the standard metric or imperial list
- [ ] Fit class is 2A/2B unless precision fit is functionally required
- [ ] Thread system (metric vs. imperial) matches your shop's primary inventory
- [ ] Diameter is a standard size (no M7, M9, M11 or equivalent imperial non-standards)
- [ ] Supplier confirmed tooling availability before drawing was finalized
- [ ] Batch size justifies any non-standard tooling investment (500+ parts rule applied)
- [ ] Alternative to non-standard thread explored (redesign, thread insert, standard substitution)
The single best habit: Before finalizing any threaded part drawing, spend 60 seconds confirming your thread against the standard list and your shop's tool inventory. That one habit consistently eliminates the most common and most avoidable cost surprises in custom machined parts.
External Links Recommendation
For further reading and reference on thread standards, tooling, and manufacturing best practices:
[Custom threaded parts manufacturing][^1]
[Standard thread vs special thread][^2]
[Thread rolling vs cutting cost][^4]
[metric vs imperial thread selection][^5]
[^1]: Comprehensive guide from TiRapid covering CNC threading techniques for custom fasteners, including thread milling, single-point turning, thread rolling, and non-standard thread profile capabilities with multi-axis CNC turning for complex geometries[citation:1]
[^2]: Engineering textbook chapter defining special threads as those with standard profile but non-standard diameters/pitches (designated with "Sp" prefix, e.g., Sp M60x5-6g) or non-standard profiles such as square or round threads, with detailed drawing requirements[citation:2]
[^3]: Detailed comparison from a precision manufacturing facility showing thread mill tools cost $150-$500+ vs taps at $20-$100. Includes real-world case study: tapping 50,000 aluminum housings saved $220,000 in machine time compared to thread milling, demonstrating that thread milling is the premium option for high-value parts where scrap risk is unacceptable [citation:1]
[^4]: Industry publication with CJWinter-developed calculator proving thread rolling becomes more economical than single-point cutting at approximately 4,000 parts or more. Testing across 1018 steel, 360 brass, and 303 stainless steel shows axial rolling pays off twice as fast as radial rolling, with coarser threads and harder materials requiring fewer parts to justify rolling [citation:2]
[^5]: Comprehensive breakdown of the Unified Thread Standard (UTS) designation system for imperial threads, covering nominal diameter, threads per inch (TPI), thread series (UNC, UNF, UNEF, UNJ, UNS), classes of fit (1-3), and modification identifiers like LH for left-hand threads


